Pimp my Gaggia – introduction
Pimping the Gaggia can be a daunting quest. I will rank mods on my subjective value/difficulty perception and provide a brief description.

Any links here are not affiliate and I don’t make any money from the blog. I guess a lot here is not only about Gaggia machines, but I like the “pimp my Gaggia” name.
Note on machine choice due to #boilergate – just buy used Gaggia. I wrote more about this in https://kozikow.wordpress.com/2024/02/28/choosing-gaggia-classic-in-2024/ .
Functional mods ranking
- Tamper
- Basket
- OPV
- Bottomless portafilter
- Gaggiuino/PID/Pressure Gauge
- Water
- Backflush basket
- Voice control
- Puck screens
- Shower screen and gaskets
- Boiler insulation or pre-heat pipe
Distribution/grinding mods ranking
- Good Grinder
- Scale
- Dosing ring
- Blind shaker
- WDT
- RDT
- Single dosing containers
- Leveling tool
Steaming mods ranking
- Steel pitcher
- Steam tip
- Gaggiuino or steam PID
- Raised feet
- Steam wand
- Steam knob
- Steaming thermometer
Cosmetic mods ranking
- Knock box / tamping station
- Water shield
- LED
- Mirror
- Drip tray
- Silencing the pump
- Topbox
Tamper
Installation difficulty: Zero
Cost: Medium
Benefit: High
Tamper you get with Gaggia machine is notoriously bad – plastic, too small.
I firstly used Motta Competition Tamper ( https://www.coffeedesk.pl/product/2672/Tamper-Motta-Competition-Czarny-58-4-Mm ) – important part is that it has an exact diameter as your basket.
However, now I use self-leveling Tamper from mh bomber: https://pl.aliexpress.com/item/1005006067113624.html for about $40. Two important features is self-leveling – I wasn’t great at keeping consistent angle. And it ensures consistent force of about 30lbs (13kg). There are much more expensive “not-Chinese” version of this design, but so far this works great for me.
Note that bomber tamper have 58.35 diameter instead of 58.5. It would fit perfectly MH bomber baskets, but leaves some space with VST. It’s not an issue for me, as I personally tamp, add puck screen, tamp again and for some reason this method (with any tamper) works really great for me. Lance please test.
Basket
Installation difficulty: Very low
Cost: Medium
Benefit: High
The default basket that comes with Gaggia Classic Pro is notoriously bad. For example see the picture of the basket under the microscope:
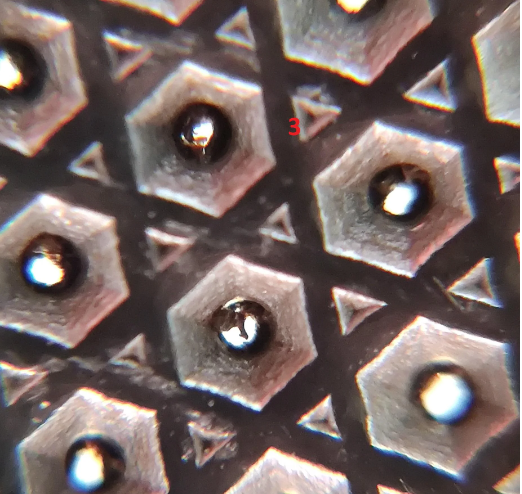
That means the coffee will be extracted very unevenly. There are 2 recommended upgrades:
- VST baskets
- IMS baskets – more budget option, some people argue it’s not worse than VST
Size is up to preference, but I like 20g ridgeless. Other options people like are Pullman, MHW-3Bomber DEX Basket, Sage/Breville.
Of course there are some hipster baskets costing hundreds of dollars I am skipping for now.
If you don’t mind spending $50 I would go for VST. If you are on a budget I would go for $20 Bomber baskets from aliexpress, reportedly quality is very good.
OPV
Installation difficulty: Medium
Cost: Low
Benefit: High
Gaggia classic machines by default have a “wrong” pressure used for brewing. About 13 Bar is significantly higher than recommended 9 Bar or even 6.5 Bar. This is because Gaggias come with 3 baskets that look like:
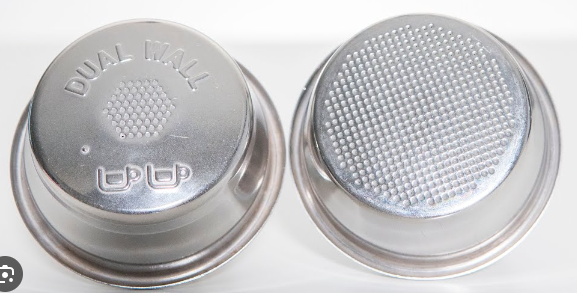
Never use basket that looks like the one on the left. “Pressurized” basked on the left needs the higher 13 Bar pressure. Always use the basket that looks like the one on the right.
OPV means exchanging a spring inside the machine to reduce the pressure. You can order OPV kit at https://www.shadesofcoffee.co.uk/opv-kits/gaggia-classic-opv-spring-mod-kit—standard-version-just-springs .
Note that if you plan to install Gaggiuino mod, you need the “stock” high pressure OPV. Gaggiuino controls the pressure on it’s own, and a customized spring would get in a way.
Water
Good water will not only improve taste, but significantly reduce scale buildup.
This item could be on the very top on the very bottom depending on quality of water you get. Start by testing – fish tank testing kits are good bank for a buck – e.g. API test kit.
I use coffee shop water – nearby coffee shop allows me to get water in a bottle – they run reverse-osmosis on and add 2 types of mineral tablets.
There are various home solutions from filtering pitchers (a lot of them are not good), in-tank filters, or custom water recipes like third wave water or mineral tablets.
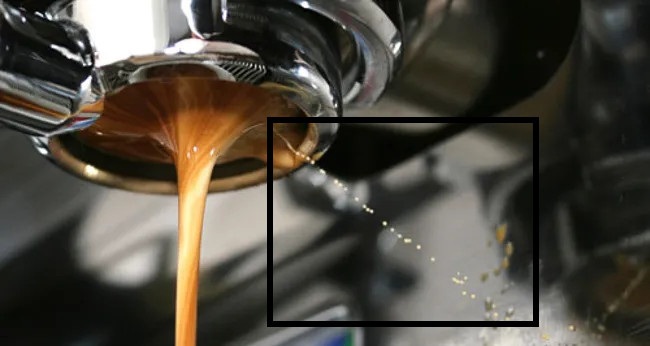
Bottomless Portafilter
Installation difficulty: Zero
Cost: Medium
Benefit: Medium
Bottomless portafilter won’t improve your extractions per-se, but it will let you spot and diagnose mistakes. Important thing to look for are changelings – coffee squirting at high pressure. You want to avoid those, as it will make your coffee too bitter.
I use shades of coffee bottomless portafilter: https://www.shadesofcoffee.co.uk/bottomless-portafilters . People also like Edesia bottomless portafilters.
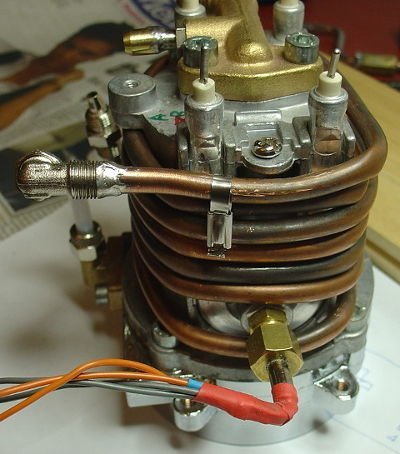
Gaggiuino/PID/Pressure Gauge
Installation difficulty: High
Cost: High
Benefit: High
Out of the box actual temperature of the boiler of your machine will look like a blue line on this chart. Pid or gaggiuino will make it look like the red line.

If you just hit brew whenever on stock Gaggia your coffee will be sometimes too sour (underextracted) and sometimes too bitter (overextracted). People “temp surf” – time the blue graph to hit brew at the right time.
Another factor you don’t have any control in the stock machine is pressure. You can change the flat pressure by the OPV spring. Pressure control allows you to do “pre-infusions” – e.g. be gentle with the pressure at the beginning. Those types of “pressure profiling” will make most coffees better.
Again, there are tricks on the stock machine by opening a steam knob, but without temperature control and a small boiler it’s even harder to control the temperature.
There are manual mods that allow you to control pressure by pressure gauge and pressure knob, but if you are going as far, you should go for Gaggiuino. Gaggiuino besides fully automated pressure profling, will also greatly improve your steaming. Gaggiuino does what no other mod does for steaming – pumps pressure during steam, what transforms Gaggia steaming from mediocre to great.
My gaggiuino install experience is in https://kozikow.wordpress.com/2024/02/22/gaggiuino-build-log/ . For many users install will be simpler than mine – if you are not dealing with ECO board or your kit will come with pre-assembled wiring.
Backflush basket
Installation difficulty: Low
Cost: Low
Benefit: Medium
Back-flushing from time to time is important. It means putting basket without holes inside portafilter, waiting until water fills up, and then turning the brew button off to send water backwards via the went tube. If you skip back-flush basket and puck screen, your shower screen will need disassembly more often and will wear out quicker.
Any cheap model would work – e.g. https://pl.aliexpress.com/item/4000632161935.html . Just put it inside your stock portafilter you got with Gaggia while you use the bottomless.
Voice control
Installation difficulty: Low
Cost: Medium
Benefit: Medium
Gaggia Classic and machines of similar type need ~10 minutes of warm up before you can make coffee. This is to allow all elements, not just the boiler to heat up. This mod feels like it’s excessive, but it have been very useful for me to just start my day by “ok google, turn on coffee” when I wake up. I’m caffeine addicted and I get headaches, mkay?
If you don’t have an ECO mode just buy any smart plug supporting 2000W+ of output and hook it up to your home assistant. Remember that it should also support grounding. There are tons of models for $20-$30.
If you have ECO mode it’s more complex – either install Gaggiuino or do just the power switch mod like in https://www.youtube.com/embed/WNs3uSLA4Ts?start=99&end=151 .
Puck Screens
Installation difficulty: Zero
Cost: Low
Benefit: Low
It’s arguable how much puck screens would impact the extraction. Some people say it improves a lot, some don’t. However, they make cleaning the machine much easier and it’s worth for this benefit alone.
I have shades of coffee screens https://www.shadesofcoffee.co.uk/stainless-steel-mesh-puck-screen-or-contact-screen-585mm-575mm—50-micron-mesh as well as aliexpress one. MHW-3Bomber puck screen is pretty cheap, so if I had to make the choice again I would just get this one and call it a day.
Some people also like Sworks Design puck screens.
Shower screen, gaskets, dispersion screens
Many people replace shower screens, group heads, dispersion screens, or gaskets. From various opinions I heard, the improvement is very minimal. I think the upgrade is only worthwhile when your stock parts wear out.
Boiler insulation or pre-heat pipe
“Gaggia boiler is so small, we need to make it keep the heat more”.
In my opinion, if you have a PID or gaggiuino, this mod wouldn’t help a lot. What’s more, reportedly, it doesn’t work well with Gaggiuino. It messes up the tuning that went into the software.
Good grinder
Any pro barista will tell you that your grinder is more important than your machine. I use Eureka Mignon Specialita that is considered to be a very standard “entry high level” grinder.
You can mod it by bellows for single dosing (push any stray grinds with air). This ali is very cheap and works very well: https://pl.aliexpress.com/item/1005006115979994.html . You can also mod the dial – normally it’s very hard to know what’s the level you are at, as standard dial takes multiple turns. You can 3d printing it, or relatively cheaply (e.g. $20) buy someone 3d printing: https://www.etsy.com/listing/1666710809/eureka-mignon-grind-adjustment-dial-for .
Scale
Skipping a scale makes it very hard to make a good coffee. When I tried “timer” function in my grinder, I ended up having over 1g deviation, that can make the same coffee totally under or over extracted. Weighting the beans or ground coffee is the only reliable way. If your grinder have good “retention” – ground coffee weights the same as beans, you can skip weighting the ground coffee. You also should weight the resulting espresso.
Scale is one of the areas where aliexpress failed me – Chineese scale wasn’t very accurate and broke after 1 month.
Timemore scales are considered the best option without going overboard with costs – e.g. I got https://labuna.pl/Timemore-Black-Mirror-Basic-czarna-2021-Waga-do-2-kg-p446 for $50.
Of course there are some crazy priced models for $200+. I would skip those – if you want something better than timemore – either get scale built-in in the tray in Gaggiuino or get a jewelerly scale. Jeweler scales are going to offer much more quality per $ than the “hipster” coffee scales, but they won’t have the built-in timer function.
Dosing ring
Dosing ring goes on top of your portafilter and helps to reduce the mess. There are various designs – 3d printed, steel rings. I tried 3 designs and steel ring with magnetic mount works the best for me. Again, it’s cheap on aliexpress: https://pl.aliexpress.com/item/4000066630106.html .
Blind shaker
Blind shaking is all the rage nowadays due to statistical tests Lance Hendrick done on youtube: https://www.youtube.com/watch?v=5ivwCm95nLc .
Proper expensive way to do it is Weber Workshops model for $80: https://weberworkshops.com/products/blind-shaker .
Bomber way I use for $20 is https://pl.aliexpress.com/item/1005005884371634.html . Bomber blind shakers have issues with static for some people – fine grinds end up staying on walls for people. It is hit and miss – I don’t get it. It also depends on humidity in your house and if you use RDT. Some people “polished” the bomber basket that solved their static issues.
Don’t let hype blind you though – I often skip blind shaking anyway, as it’s just too time consuming. Have you ever done coffee while holding a baby in another hand? I did. And blind shaking with one hand means you won’t hold it well, it got loose and coffee grounds ended up all over the kitchen.
WDT
WDT – using needles to distribute your coffee was all the rage prior to blind shakers. You can 3D print it yourself. Or get something that has 8 needles (thickness of the needles should be around 0.3mm). Model I have is not ideal (needles are a little bit too thick), so I won’t link it here.
Even if I have blind shaker, I still often just end up grinding to PF directly, tapping during grinding and afterwards, WDT, tap again. It’s significantly quicker that blind shaker for me.
RDT
RDT – ross droplet technique refers to spraying the coffee beans with water prior to grinding. It reduces the static and James Hoffman says in his YT video it has more benefits: https://www.youtube.com/watch?v=nLnB99VJ0HE .
I sometimes do it, sometimes don’t. I notice a difference. Just get any cheap water spray bottle from something like Dollar Store in the USA or Pepco in the Europe.
Single dosing containers
Single dosing containers for me are very useful. I can weight the coffee in the evening and in the morning when I’m caffeine-deprived, kitchen is busy, I can get coffee done quicker. And another benefit is that you open your coffee bag less frequently, so it gets less air exposure.
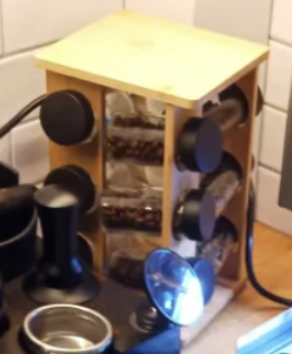
Way to save cost on those and get a nice design is go for spices containers. I got https://allegro.pl/oferta/zestaw-przyprawnikow-organizer-smukee-12-pojemnikow-nowy-15160758972 and insulated it with flat silicone to make it air-tight for less than half cost of dedicated coffee rigs.
High end solutions include additional “one-way” lid. That lets carbon dioxide from coffee beans escape without letting the air in – e.g. https://pl.aliexpress.com/item/1005006326705735.html .
Really cool design you could 3d print is magnet-mounted cellar discussed on Gaggiuino discord here: https://discord.com/channels/890339612441063494/1211278911342903306 .
Leveling tool
Leveling tools is used to level the coffee after grinding and before the tamping. Just tapping the portafilter is considered to be a better method. Gently hit the portafilter on the side where there is less coffee with dosing ring on.
Steel pitcher
Installation difficulty: Zero
Cost: Low
Benefit: High
Steel pitcher for steaming should be sized to match exactly the amount of milk you need for your cups. Pour milk until the beginning of the tip.
Important function is thermal conductivity – based on your hand feeling on the cup you should feel when to end the steaming.
Steam tip
Installation difficulty: Low
Cost: Low
Benefit: Medium
An artisan steamer will make a great steam with any steam hole tip. Stock Gaggia comes with 2 hole steam tip. I also tried 3 hole steam tip from aliexpress ( https://pl.aliexpress.com/item/1005005131116455.html ). Technique for steaming depends on number of holes and it’s a highly personal thing. Most professional machines use 4 holes. But if you are reading this you are probably not a professional and it takes skill, so I would recommend 1 hole tip from shades https://www.shadesofcoffee.co.uk/the-one-single-hole-steam-tip-for-the-gaggia-classic-pro .
If you are beginner at steaming, probably the most important factor is how hard it is to accidentally raise one of the holes over the milk and create those big nasty bubbles we all want to avoid. 1 hole steam tip is the best from this perspective. 3-hole from aliexpress is not a lot worse than 1 hole from shades for 1/5 of the price, but I liked it a lot more than stock.
Gaggiuino or steam pid
Default Gaggia runs our of steam very fast.
Some PID kits also support steaming temperature. That helps a lot.
Gaggiuino helps a lot on top of that – pumping additional water on top of raising the temperature.
Raised feet
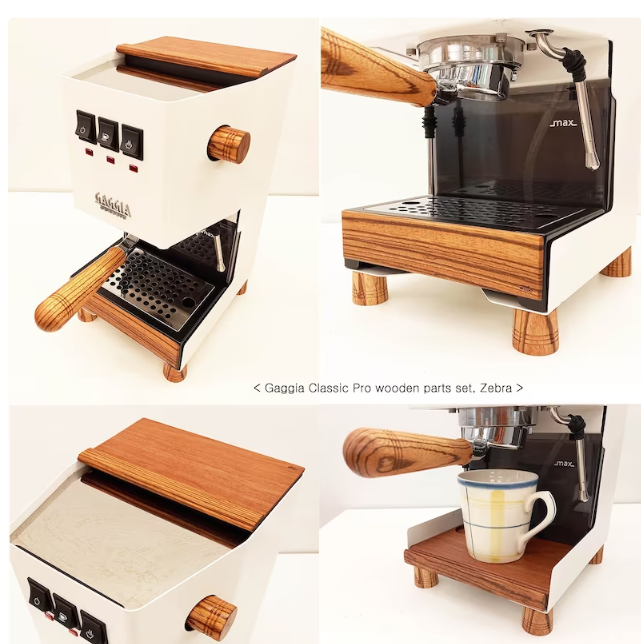
If you like big lattes, raised feet serve important function – they allow you to fit larger milk pitcher. It happened to me that I was hitting a table when I was going down with my steaming. I just have those 3d printed feet: https://www.printables.com/model/626360-gaggia-classic-extended-feet-remixed .
There are cool wooden finish sets for Gaggia Classic Pro like https://www.etsy.com/listing/1153210132/gaggia-classic-pro-coffee-machine-wood , but I didn’t order it, as it’s pricey.
Steam wand
Installation difficulty: Medium
Cost: High
Benefit: Medium
Many people replace the steam wand. I didn’t do it yet, I just learned to use Gaggia Classic Pro steam wand. Gaggia classic Pro wand is pretty good, but Gaggia Classic (old model with big switch in the middle) wand is not great.
Some people replace it by Rancillo steam wand. You don’t want just any Rancillo steam wand. You want the version that comes with a ball joint – full movement in all directions. Version without the ball joint is not enough of an upgrade. You will also need adapter kit from Rancillo to Gaggia like https://espressocare.com/products/steam-wand-kit-gaggia. I didn’t find a way to make it significantly cheaper than the espresso lane kit mentioned next.
Full kit, but it’s a bit pricey, but also includes the “cool touch” feature: https://www.espressolane.uk/product/gaggia-cool-touch-pippa-pre-2015-classic-2018-19-classic-pro-to-cool-touch-s-steel-one-hole-steam-wand-available-may-june-2023/. Cool touch not only prevents accidental burns to your hand, but it also makes cleaning easier.
There is interesting new mod from Shades – if your wand starts leaking at some point and it annoys you can get https://www.shadesofcoffee.co.uk/classic-steam-valve—new-design-shades-of-coffee-version – it’s still work in progress.
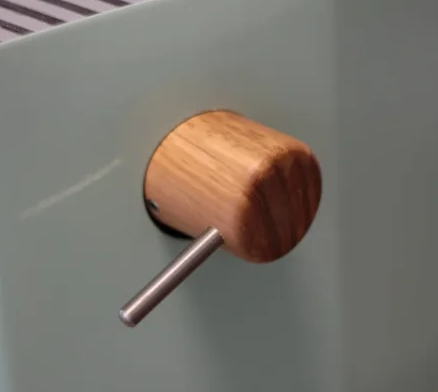
Wooden Steam knob
Wooden steam knob is the biggest impact visual upgrade for your machine. It might serve a minimal practical function if you get a knob with a lever to see how far you opened the steam. I have this one: https://coffee-sensor.com/product/gaggia-classic-custom-steam-knob-from-olive-wood-with-stainless-arm/
Steaming thermometer
I have a steam thermometer and I don’t use it to be honest. I find testing temperature by hand feeling on steam pitcher good enough. And the thermometer gets in a way.
Knock box / tamping station
This set from Ali works perfectly for me https://pl.aliexpress.com/item/1005006192034443.html for just $30.
It’s purely a convenience feature, but it’s very useful to have a place for removing used pucks or have a dedicated spot for tamping.
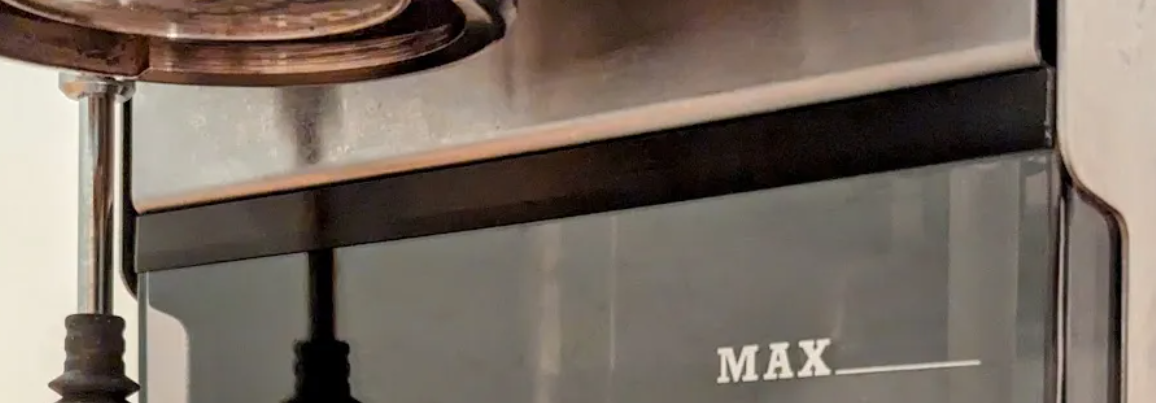
Water shield
Installation difficulty: Low
Cost: Low
Benefit: Medium
By deault Gaggia water tank is too small. If you have pets in the house hair can get into your coffee water. I think everyone should do it given low cost of 3d printing. Print this file ( https://www.printables.com/model/734801-water-tank-splatter-shield-for-gaggia-classic-pro-#preview ) and put this piece of plastic on top of your water tank. It will also help with bright LED lights if you get them.
LED
Installation difficulty: High
Cost: Low
Benefit: Medium
Led seems like a show-off feature, but they serve important function. I used to think “I don’t need leds”. Turning brew on without water in the tank happened to me. It can damage your machine. It never happened after leds, as water level is much more visible.
You can get LEDs via Gaggiuino mod or install a direct LED mod.
Mirror
Mirror for your bottomless portafilter was one of those mods that made me consider “I am over-engineering it?”. It was pretty cheap from aliexpress ( https://pl.aliexpress.com/item/1005006137336339.html ), but I ended up using it more than I thought.
Drip tray
If you like big lattes low drip tray helps to fit larger cups under the portafilter.
I have extended slim drip tray from shades of coffee: https://www.shadesofcoffee.co.uk/extended-for-scales-max-slim-drip-tray-complete-with-large-grate-and-long-vent-tube-for-gaggia-classic .
I regret getting it, as Gaggiuino scales integration does not work with extended drip tray. For Gaggiuino scales I plan to just 3d print or order a low drip tray like https://gaggiuino.espressio.nl/products/low-profile-drip-tray .
Silencing the pump
Some people don’t like Gaggia machines being loud. Some people install Pulsar mod what silences the pump.
Popular new mod is installing 3d printed silencing housing for the pump: https://www.printables.com/model/771590-low-noise-ulka-pump-mount-gaggia-classic-pro .
Topbox
My view is that if you go as far as installing pressure gauge and adding TopBox (e.g. https://www.shadesofcoffee.co.uk/topbox-pid-mounting-system), you should just install Gaggiuino at this point.
Additional links
- Some suggestions for things I didn’t try have been taken from Gaggiuino thread: https://discord.com/channels/890339612441063494/1070090392155979861/1187404052401754113

Leave a comment